: Budget Beast Under ₱6K?")


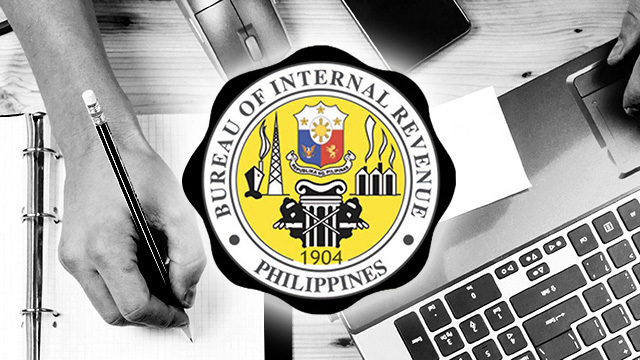
Starting a business in the Philippines is exciting, but before you can officially operate, one important task awaits: registering with the Bureau of Internal Revenue (BIR). BIR registration legitimizes your business and ensures you’re complying with tax laws — a must whether you’re a freelancer, sole proprietor, partnership, or corporation.
In this step-by-step guide, I’ll walk you through the entire BIR registration process, explain the requirements, and share a few tips to make it smoother.
Why is BIR Registration Important?
Registering with the BIR allows you to:
- Legally issue official receipts and invoices.
- Pay the correct taxes.
- Avoid penalties for operating an unregistered business.
- Build credibility with clients, suppliers, and banks.
Step-by-Step Guide to BIR Registration
Step 1: Secure Your Business Name Registration
Before heading to the BIR, you need to have your business name registered:
- For sole proprietorship: Register with Department of Trade and Industry (DTI).
- For partnerships and corporations: Register with the Securities and Exchange Commission (SEC).
- For cooperatives: Register with the Cooperative Development Authority (CDA).
You’ll need your Certificate of Registration from these agencies for your BIR application.
Step 2: Gather the Required Documents
Prepare the following documents:
- DTI or SEC or CDA Registration Certificate
- Barangay Clearance
- Business Permit (Mayor’s Permit)
- Valid government-issued ID (for individual businesses)
- Lease contract or proof of business address (if rented) or Certificate of Land Title (if owned)
- Books of Accounts (more on this later)
- Application forms (BIR Forms 1901 or 1903, depending on your business type)
Tip: Photocopy each document at least 3 times. BIR often asks for multiple copies.
Step 3: Fill Out the Appropriate BIR Forms
There are different forms depending on your business type:


- BIR Form 1901: For sole proprietors, freelancers, and professionals.
- BIR Form 1903: For corporations and partnerships.
- BIR Form 1905: If you’re updating existing registration details.
- BIR Form 0605: Payment form for the registration fee.
- BIR Form 2000: Documentary Stamp Tax form (for some cases like lease contracts).
You can download these forms from the BIR website or get physical copies at your assigned Revenue District Office (RDO).
Step 4: Pay the Annual Registration Fee
Every business must pay a ₱500 Annual Registration Fee.
- Fill out BIR Form 0605.
- Pay at any authorized agent bank (AAB) of your RDO or via electronic payment channels like GCash, Landbank LinkBiz, or PayMaya.
Keep the proof of payment — you’ll need to submit it later.
Step 5: Submit Your Documents at the RDO
Go to the BIR Revenue District Office (RDO) that has jurisdiction over your business address.
Submit:
- Completed application form
- Registration fee payment proof
- Other supporting documents
You’ll also be asked to:
- Register your Books of Accounts (manual, loose-leaf, or computerized).
- Apply for Authority to Print (ATP) for your official receipts and invoices.
Important: If you’re a freelancer or home-based business owner, your “business address” is usually your home address.
Step 6: Attend the Taxpayer’s Initial Briefing
After submitting your documents, you may be required to attend a Taxpayer’s Initial Briefing at your RDO. This is a short orientation where they explain your tax obligations, how to file tax returns, deadlines, and common mistakes to avoid.
Step 7: Claim Your BIR Certificate of Registration (COR)
Once everything is processed, you will receive your BIR Form 2303 – Certificate of Registration. This important document shows your:
- Taxpayer Identification Number (TIN)
- Registered taxes (e.g., income tax, VAT, percentage tax)
- Official business name
Note: You must display your COR in a visible place at your business premises.
Step 8: Apply for Invoices and Receipts (ATP)
You need to apply for an Authority to Print (ATP) official receipts and invoices. You cannot simply print your own; only BIR-accredited printers can do it.
Here’s how:
- Submit BIR Form 1906 (Application for Authority to Print).
- Once approved, coordinate with a BIR-accredited printer.
- Wait for your printed official receipts and invoices — you’ll also register these with the BIR.
Step 9: Register Your Books of Accounts
All businesses are required to keep Books of Accounts. These are records of your sales, expenses, and other transactions.
You must choose the type:
- Manual Books (e.g., ledger, journal) – common for small businesses.
- Loose-leaf Books (must be approved).
- Computerized Accounting Systems (for bigger companies).
Bring your blank books to the RDO for stamping during registration.
Summary of Estimated Costs
| Item | Estimated Cost |
|---|---|
| Annual Registration Fee | ₱500 |
| Documentary Stamp Tax (per document) | ₱30 |
| Books of Accounts (each) | ₱50–₱100 |
| Printing of Official Receipts (minimum set) | ₱1,500–₱3,000 |
Total Initial Expenses: around ₱2,000–₱4,000, depending on your location and needs.
Common Mistakes to Avoid
- Wrong RDO: Always register at the RDO that covers your actual business address.
- Missing requirements: Double-check all documents before visiting the RDO.
- Delays in receipt printing: Without printed receipts, you cannot issue official invoices — avoid delays by applying for ATP early.
- Ignoring deadlines: After registration, you must regularly file tax returns, even if you have zero income.
Final Thoughts
Registering your business with the BIR may seem tedious, but it’s crucial for operating legally in the Philippines. Once registered, you’ll have peace of mind, and your business will look more trustworthy to clients and partners.
It’s a one-time effort that leads to a lifetime of opportunity — so tackle it confidently and correctly!
Disclaimer: Images used in this article are for illustrative purposes only. All photos belong to their respective owners. If you are the copyright holder of any image and wish to request removal or credit update, please contact us.